(Note: This tutorial has been permanently moved from Pxleyes to grepless in order to give it better visibility and responsiveness.)
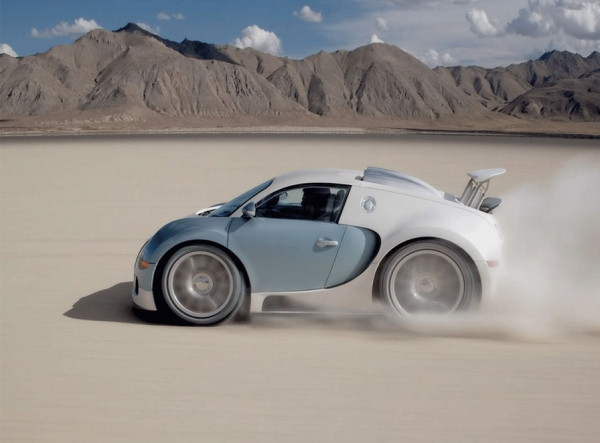
In this tutorial we will have fun making mini cars that still look realistic. It is fairly simple and only requires moderate skills in using layer masks. The tutorial is done using CS3 but can be done with most versions of Photoshop.
Shortcut keys are for PC users. If you can't use layer masks (which I will not explain as I am assuming that you know how) then carefully use the eraser.
Step 1
Source used: http://www.flickr.com/photos/guano/414733876/ Thanks Guano for the great image. You can use any image of a car but it is best to start with a straight profile, as these are easier.

Step 2
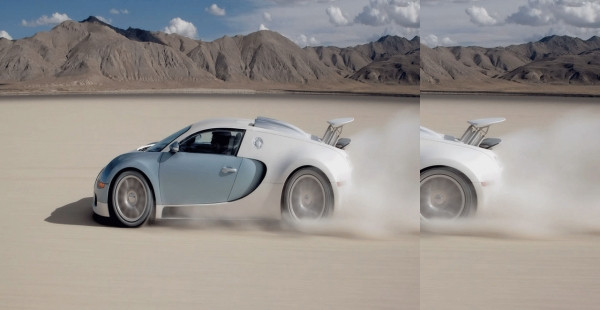
Let's crop the image, removing the top and bottom one thirds as they are not needed. Duplicate the background layer. Rename this layer 'Mini car'. Now we must Free Transform (Ctrl + T) the Mini car layer, grab the right side and shrink it by moving it to the left about two thirds of the way.
Step 3
Hide the Mini car layer. Now back on the Background layer using the Rectangular Marquee Tool (M), start at the petrol cap and create a rectangle making sure to go past the back of the car and below the tyre. Copy and paste this to a new layer and name it 'rear wheel'. Move this layer to the top. With all layers visible it should look like this.

Step 4
Now hide the background image. Free transform the Rear wheel layer and lower the opacity to 70%. This is where the fun begins. Position the wheel carefully so that the rear wheel arch is nearly in the same place. I used the rear bumper line as a guide. I also made sure that the front of the wheel arch didn't cover the air intake.

Step 5
Now bring the opacity back to 100% and create a layer mask (click on the rectangle with the circle in it at the bottom of the layer's window). Using a 35px brush at 0% hardness and the foreground colour set to black, start removing the areas that are not required. We want to keep the wheel and wheel arch panel. Use a smaller brush of 17px for the areas like the air intake and rear bumper. I also like to hide the Mini car layer when I think I am done to make sure I haven't left any straight edges so that the image blends better. It should now look like this.

Step 6
Now we will repeat the last process for the front wheel. Hide all layers except the Background layer and using the Rectangular Marquee Tool create a rectangle around the front wheel. Copy and paste this on a new layer, place this layer to the very top and rename it 'Front wheel'. Hide the Background layer again and lower the opacity on the Front wheel layer to 70%. Using the front bumper as the guide, move the front wheel into its new position. It should look something like this.

Step 7
Put the opacity back to 100% and create a layer mask for this layer. Using the same brush size and settings as with the previous wheel, remove the areas that are not required. This is how mine looks.

Step 8
We're getting there, only a few more steps. Now we want to recreate the front air intake on the lower sill. Hide all layers except the Background and on this layer we will select the air intake using the Rectangular Marquee Tool starting from the back of the tyre up to the section of the door. Copy and Paste this to a new layer, place it to the very top and rename it 'Sill air intake'. Lower the opacity to 70% and position it so that the rear of the tyres matches. I skewed the rear a little so that if followed the sill lip correctly. To do this, whilst in Free Transform, right click inside the box and click on skew. Then using the centre marker on the right side, drag it down until the sills line up.

Step 9
We just keep repeating the process. Create a layer mask and hide the areas not required. I hid everything above the white of the sill and blended in the rear section just before the rear wheel.

Step 10
Just about there. Create a new layer and name it 'Door gap'. Now using the Eyedropper Tool (I) position it over the front door gap just ahead the mirror. It should have sampled the blue colour. Now select the Brush Tool (B) and use the settings 1px 0% hardness click on the line just above the wheel arch. Holding the shift key, position your brush on the bottom of the wheel arch directly below the line and click. You should have a straight line downward. Now go to Filter and click on Blur.

Step 11
All we need to do now is crop the image and we are done. I hope you have enjoyed this tutorial and the you create some wonderful mini cars of your own.